.png?table=block&id=efdd912d-b96f-43ec-9ecc-801ce6221404&cache=v2)
DIY Surveillance Camera
DIY Surveillance Camera
Learn how to make a DIY surveillance camera using an ESP8266 microcontroller, an Arducam OV2640 2MP camera, and jumper wires. The camera can be accessed through a web browser within the same WiFi network. Total cost is 37€. Follow the step-by-step instructions to install the required software and libraries, and upload the code.
Materials:
- ESP8266 microcontroller: $5
- Power bank or wall adapter: free
- Arducam OV2640 2MP camera: $30
- Female-female jumper wires: $2
- Box: free
- Micro USB cable: free
Total cost: $37
Software needed:
Files needed:
- Zipped folder with code file and required libraries
Instructions:
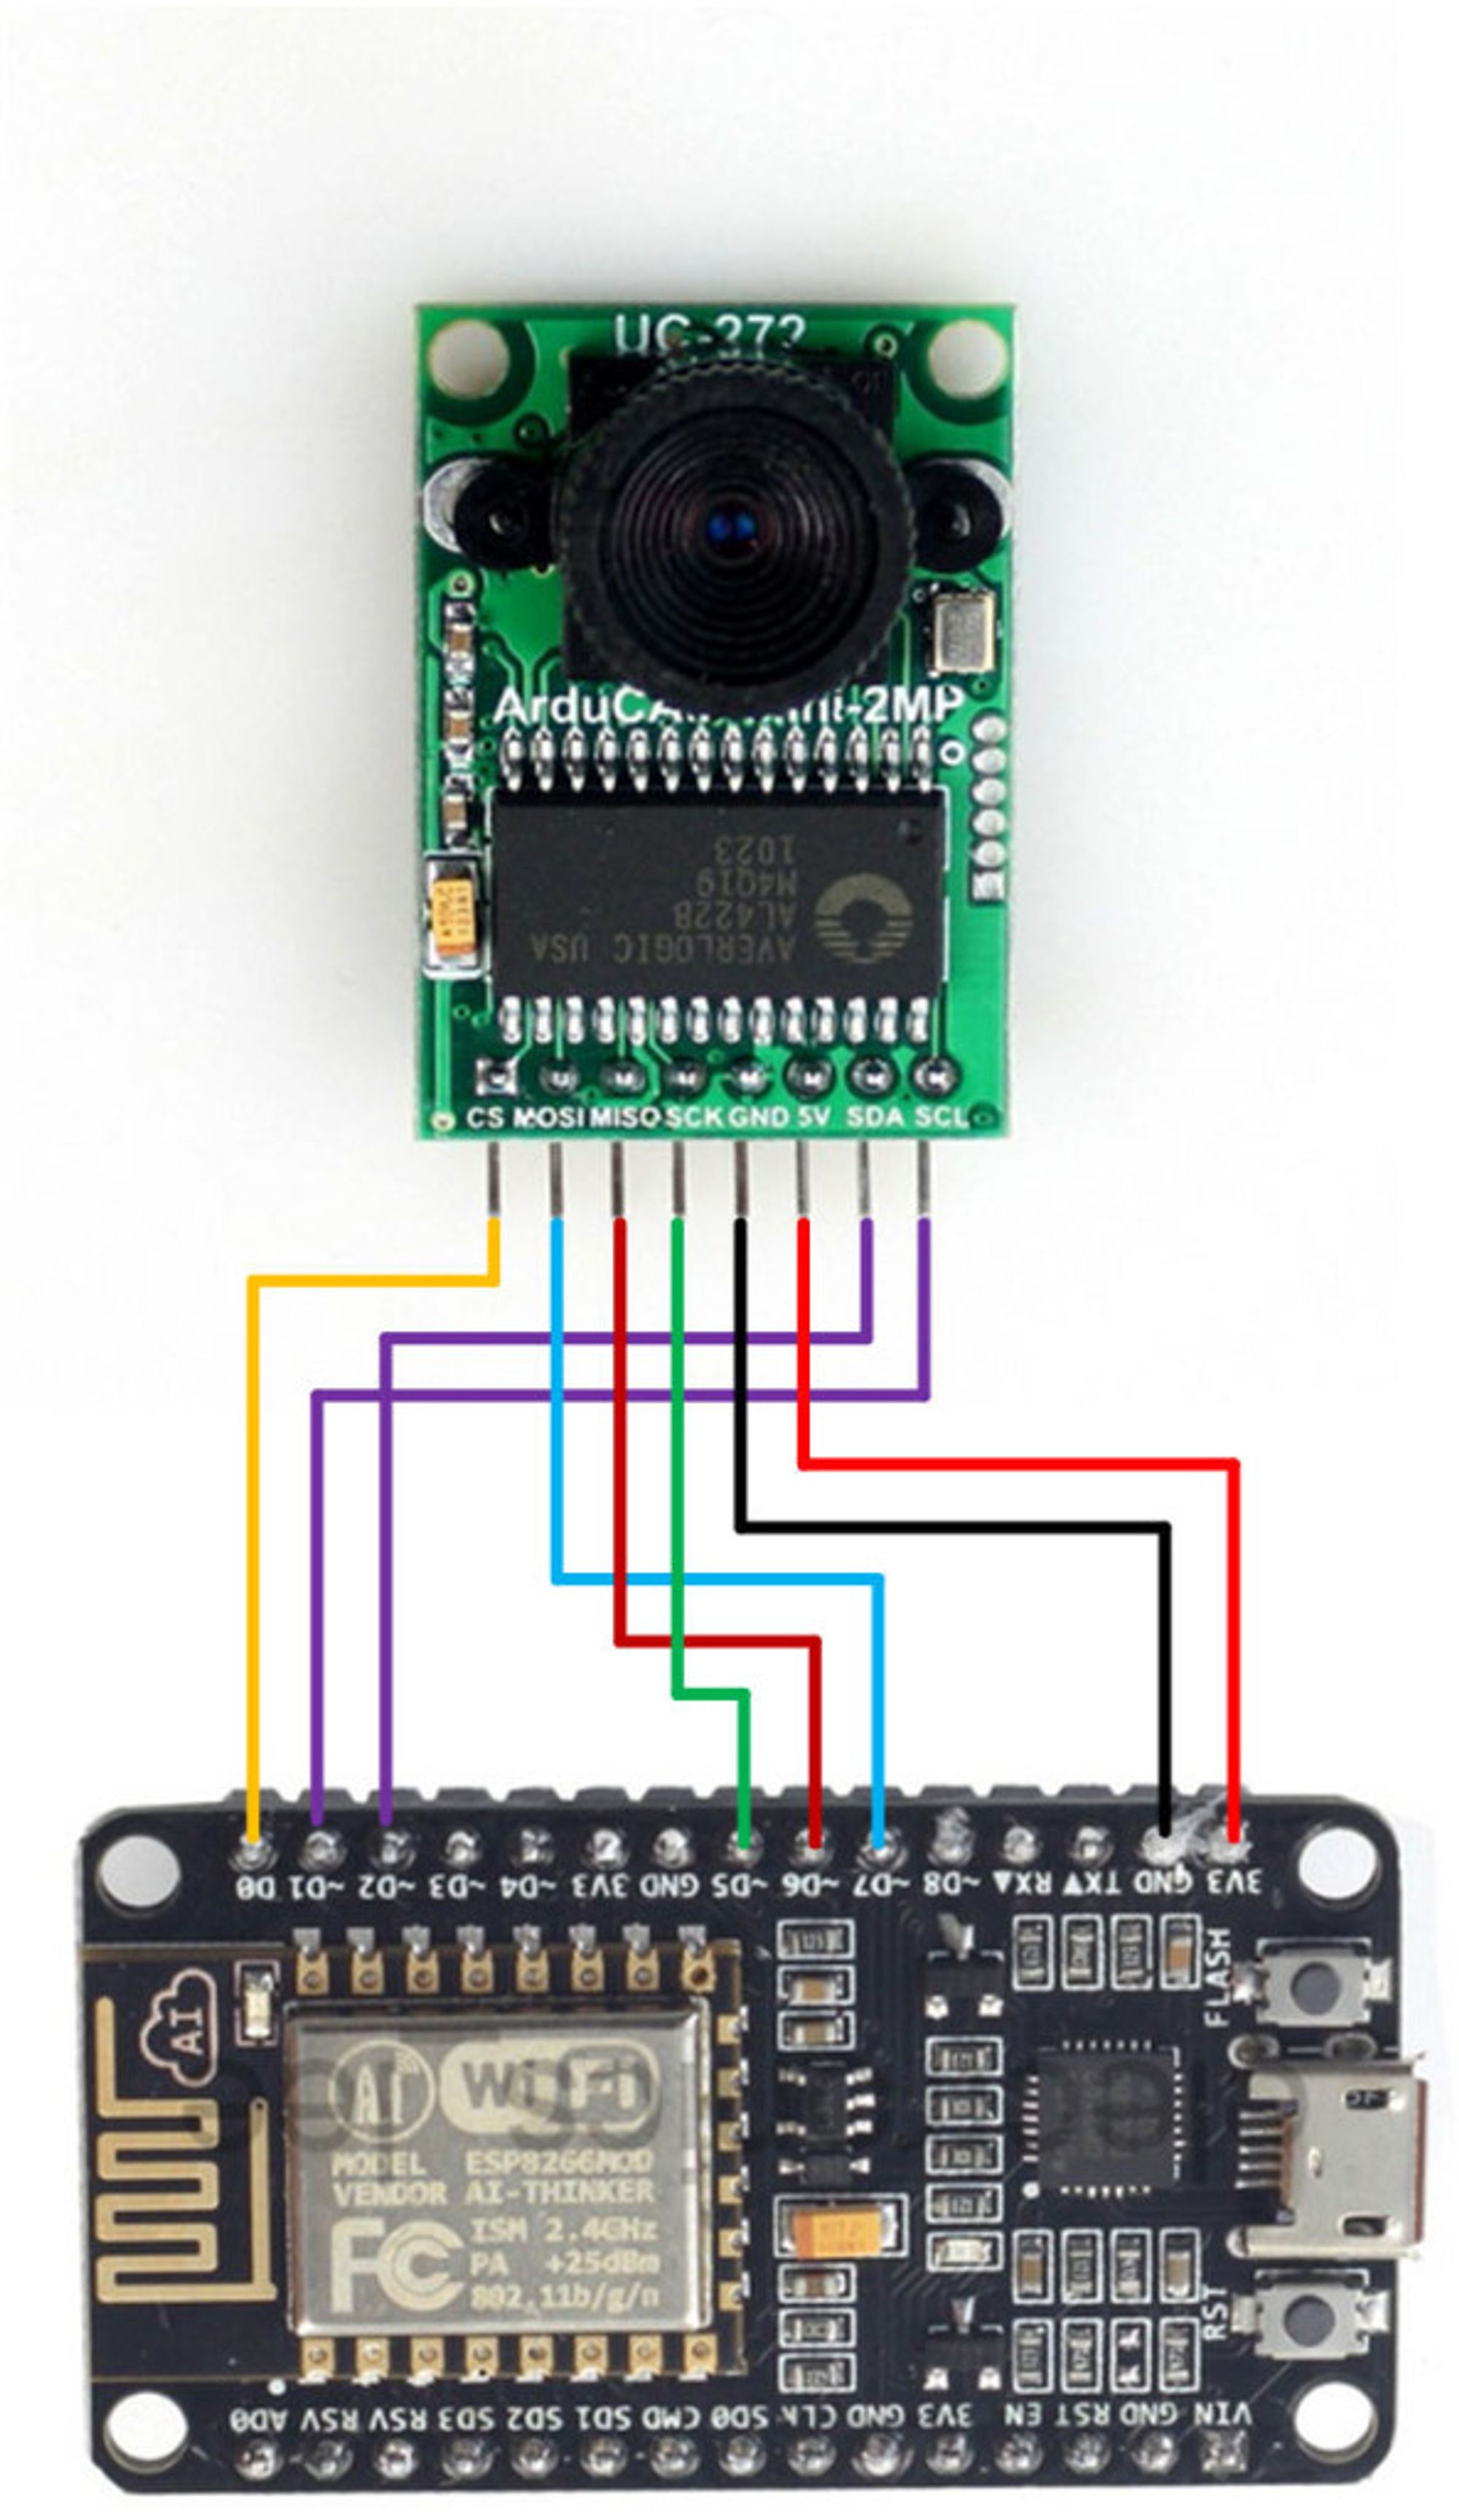
1. Connecting the ESP8266 and Arducam
Pin mapping:
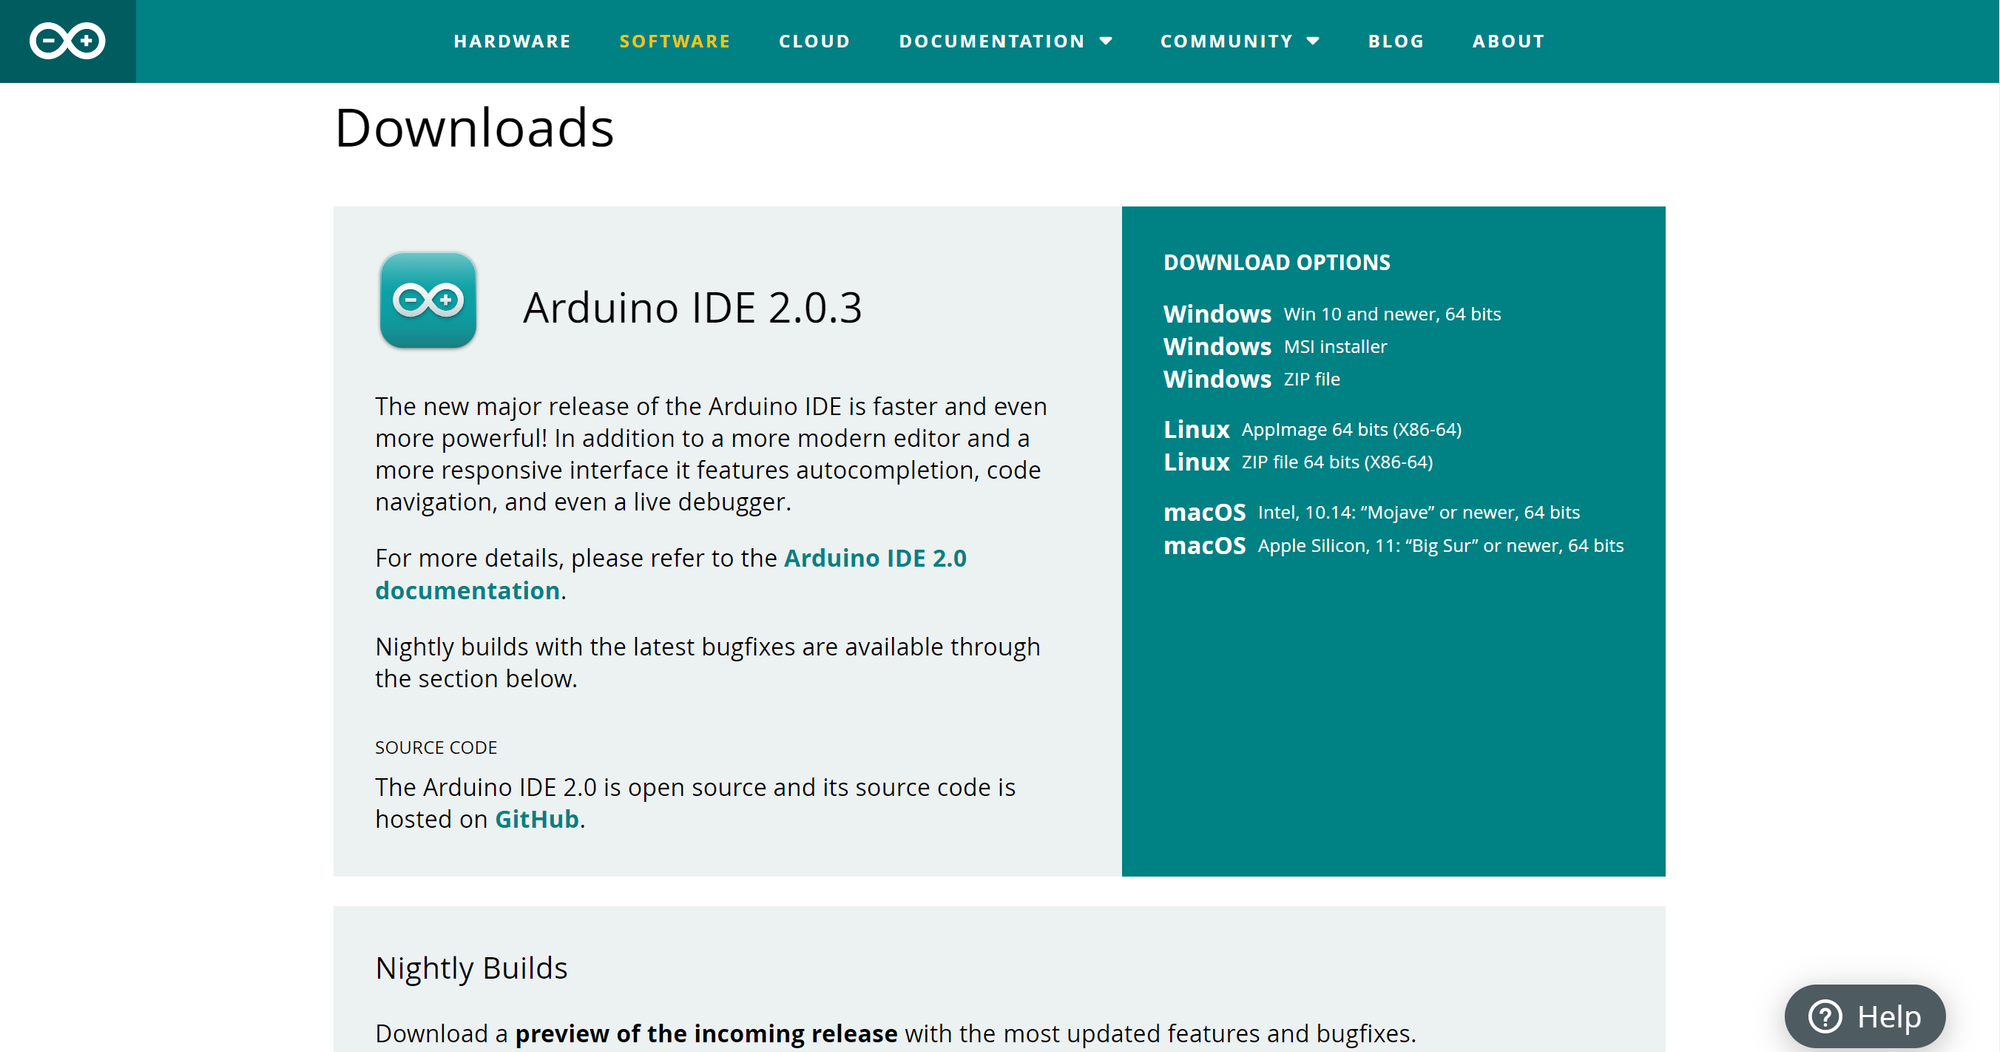
2. Installing the Arduino IDE
3. Installing the ESP8266 board files
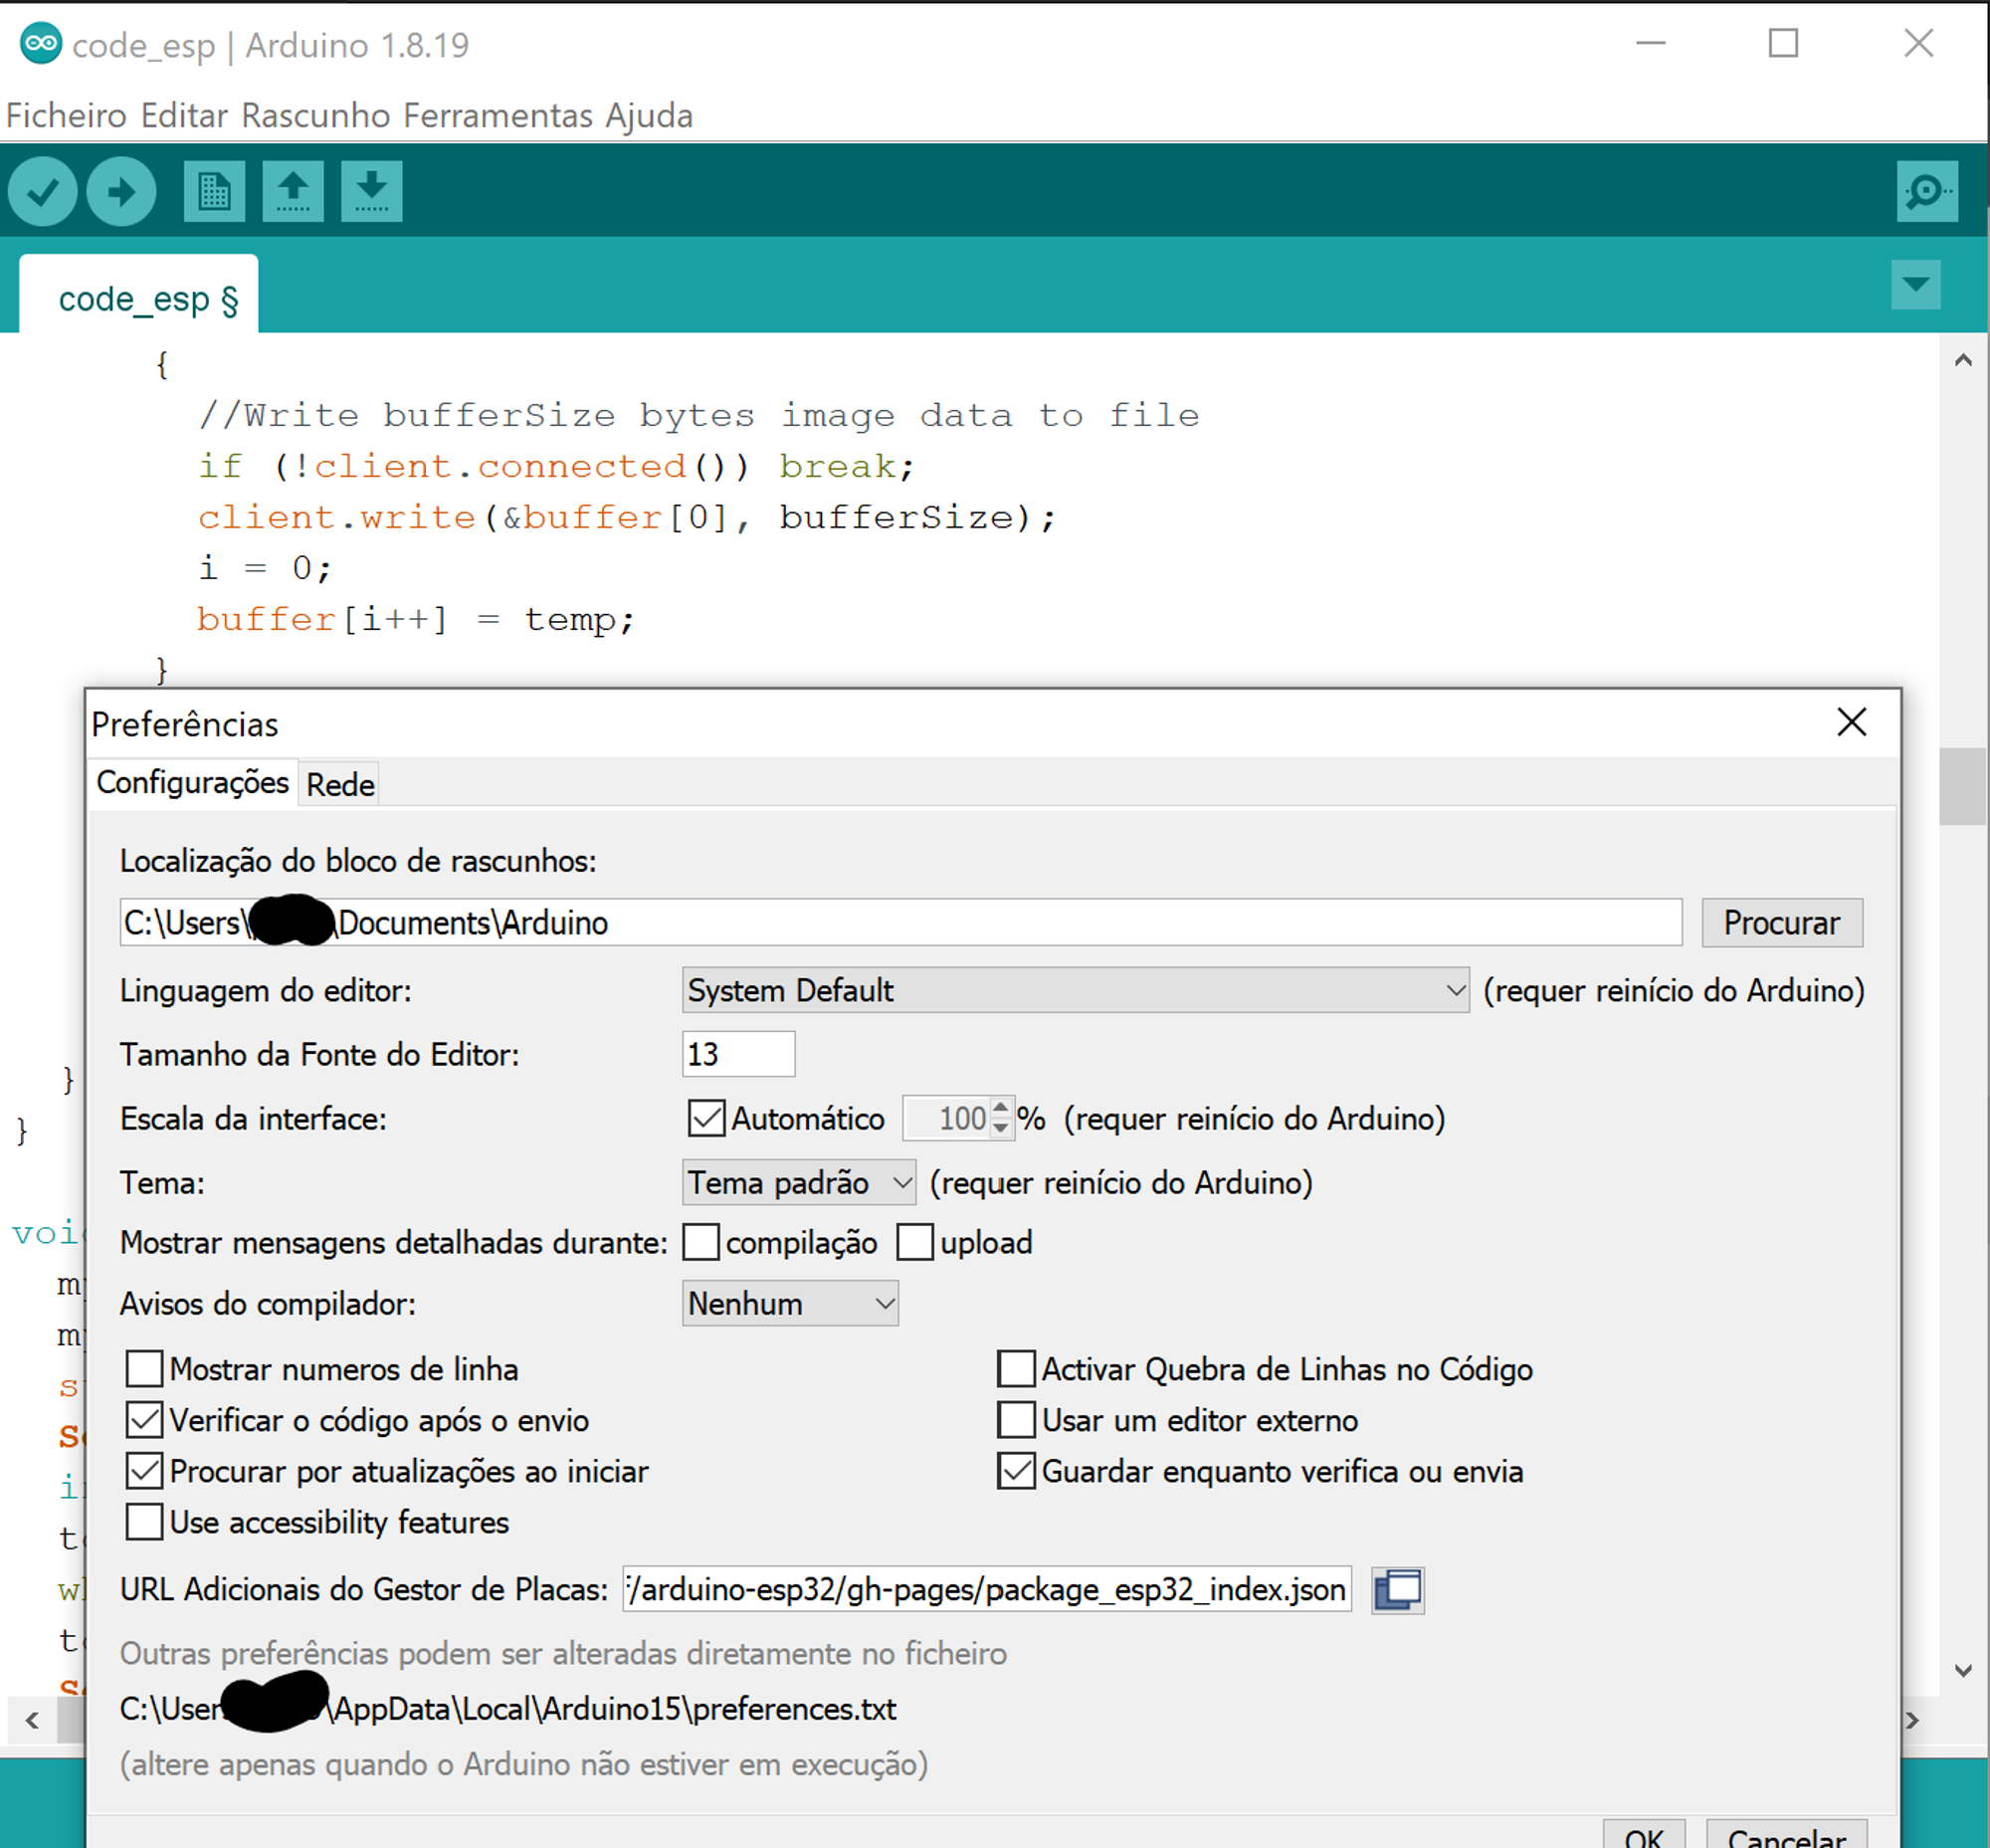
- In Arduino IDE, go to File > Preferences.
- In Additional Boards Manager URLs, enter “http://arduino.esp8266.com/stable/package_esp8266com_index.json”.
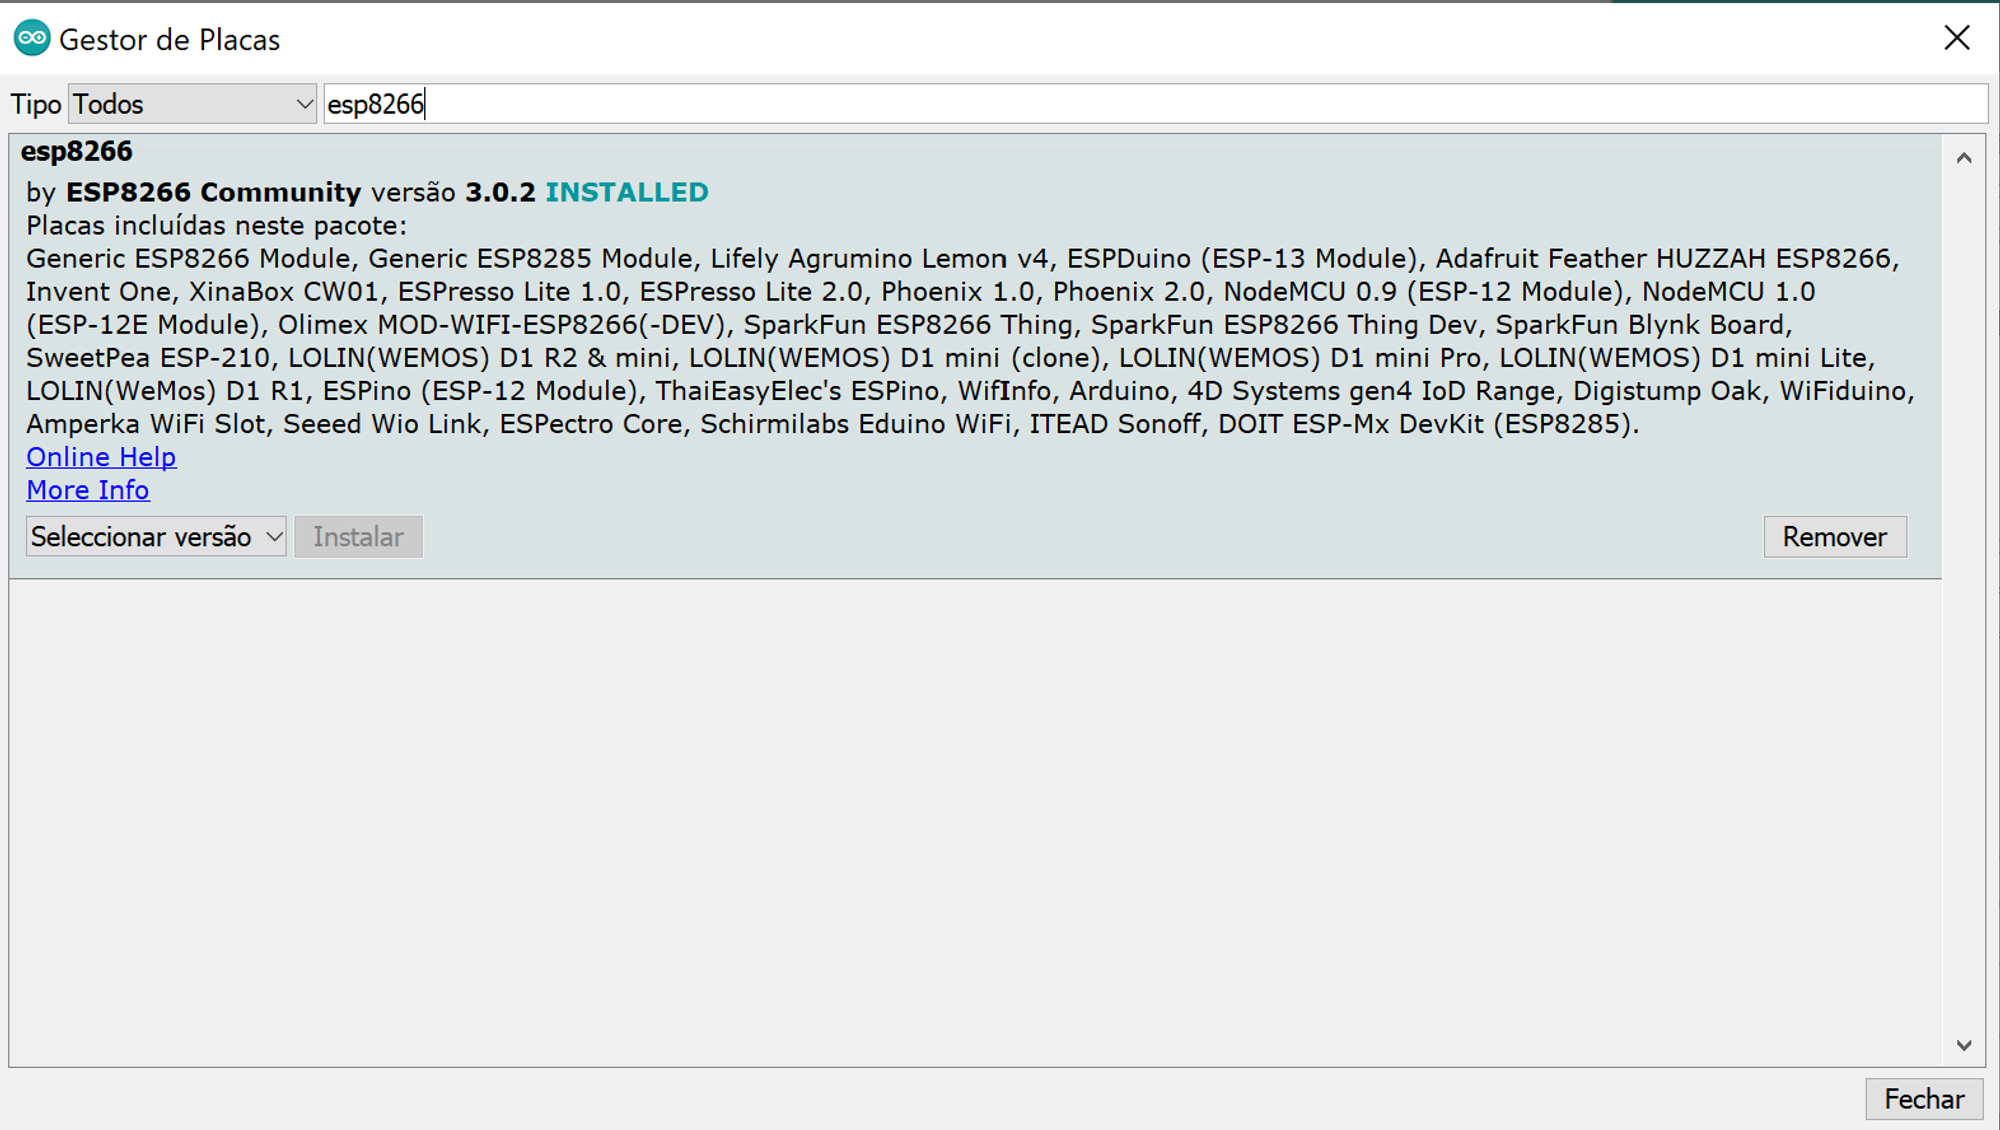
- In Arduino IDE, go to Tools > Board > Boards Manager.
- In Boards Manager, search for “esp8266” and install the package.
4. Installing the required libraries
- In Arduino IDE, go to Sketch > Include Library > Add .ZIP Library.
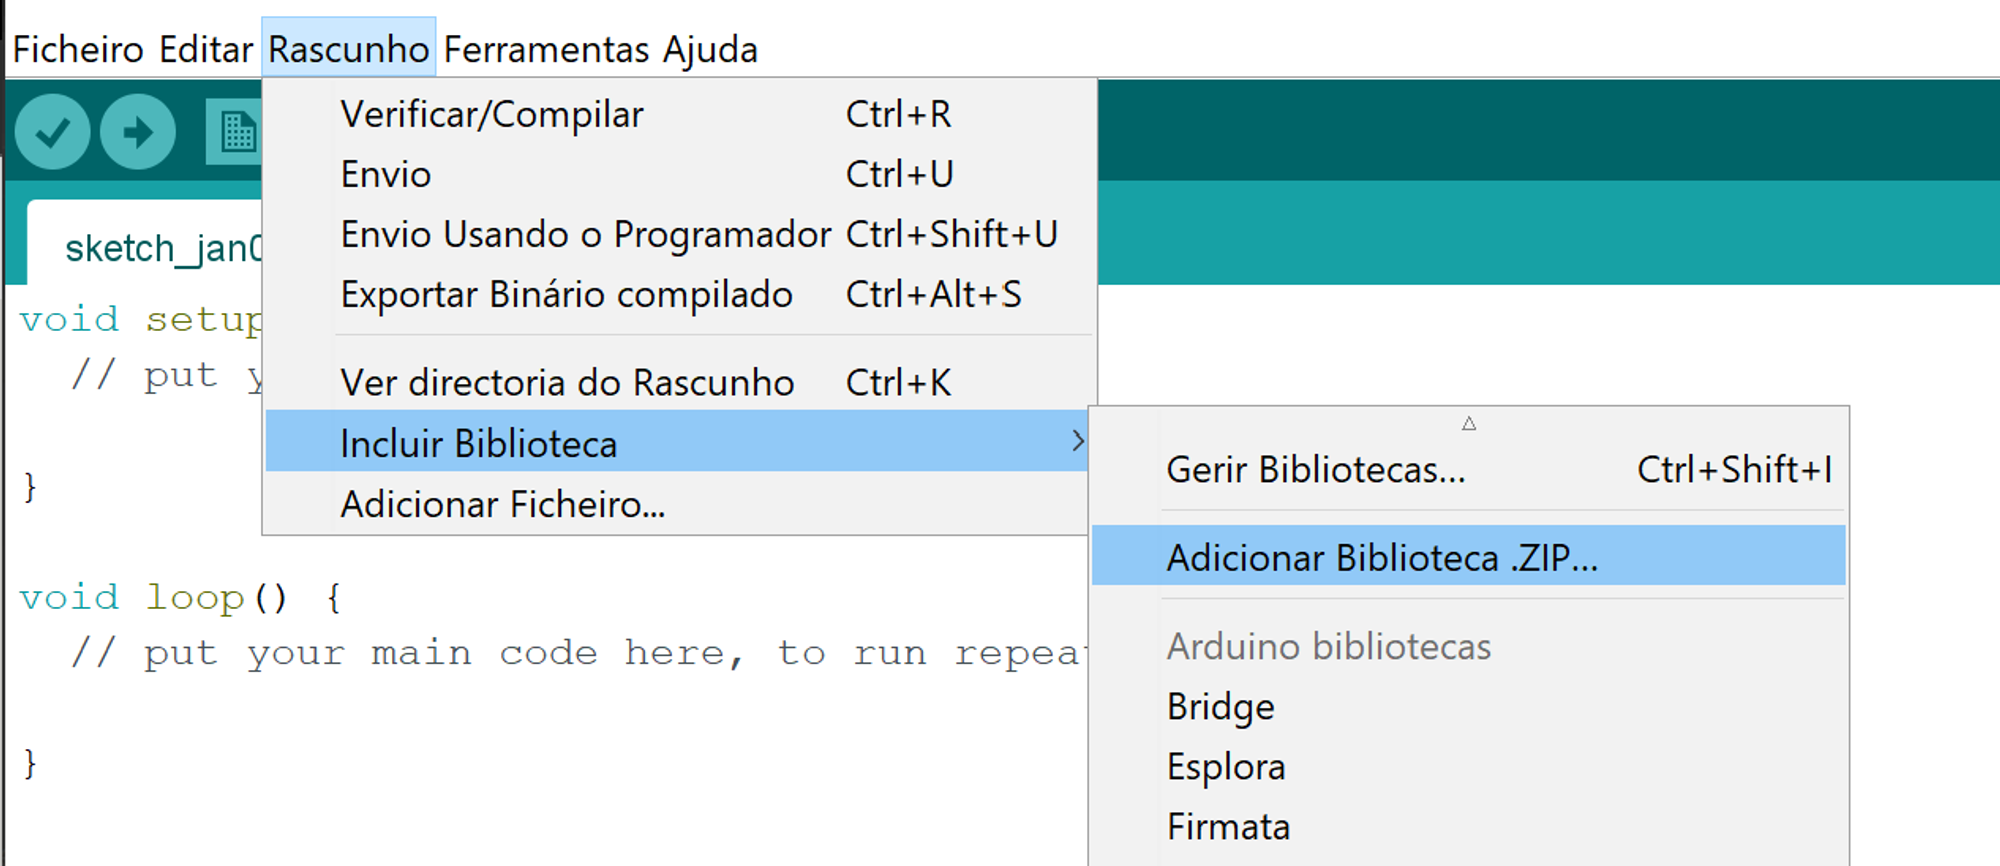
- Select the downloaded zipped folder, and click “Open”.
- In Arduino IDE, go to Sketch > Include Library, and select “ArduCAM”, “UTFT4ArduCAM_SPI”, and “ESP8266-Websocket”.
5. Opening the code
- In Arduino IDE, go to File > Open.
- Select the code file from the downloaded zipped folder and click “Open”.
6. Editing the WiFi credentials
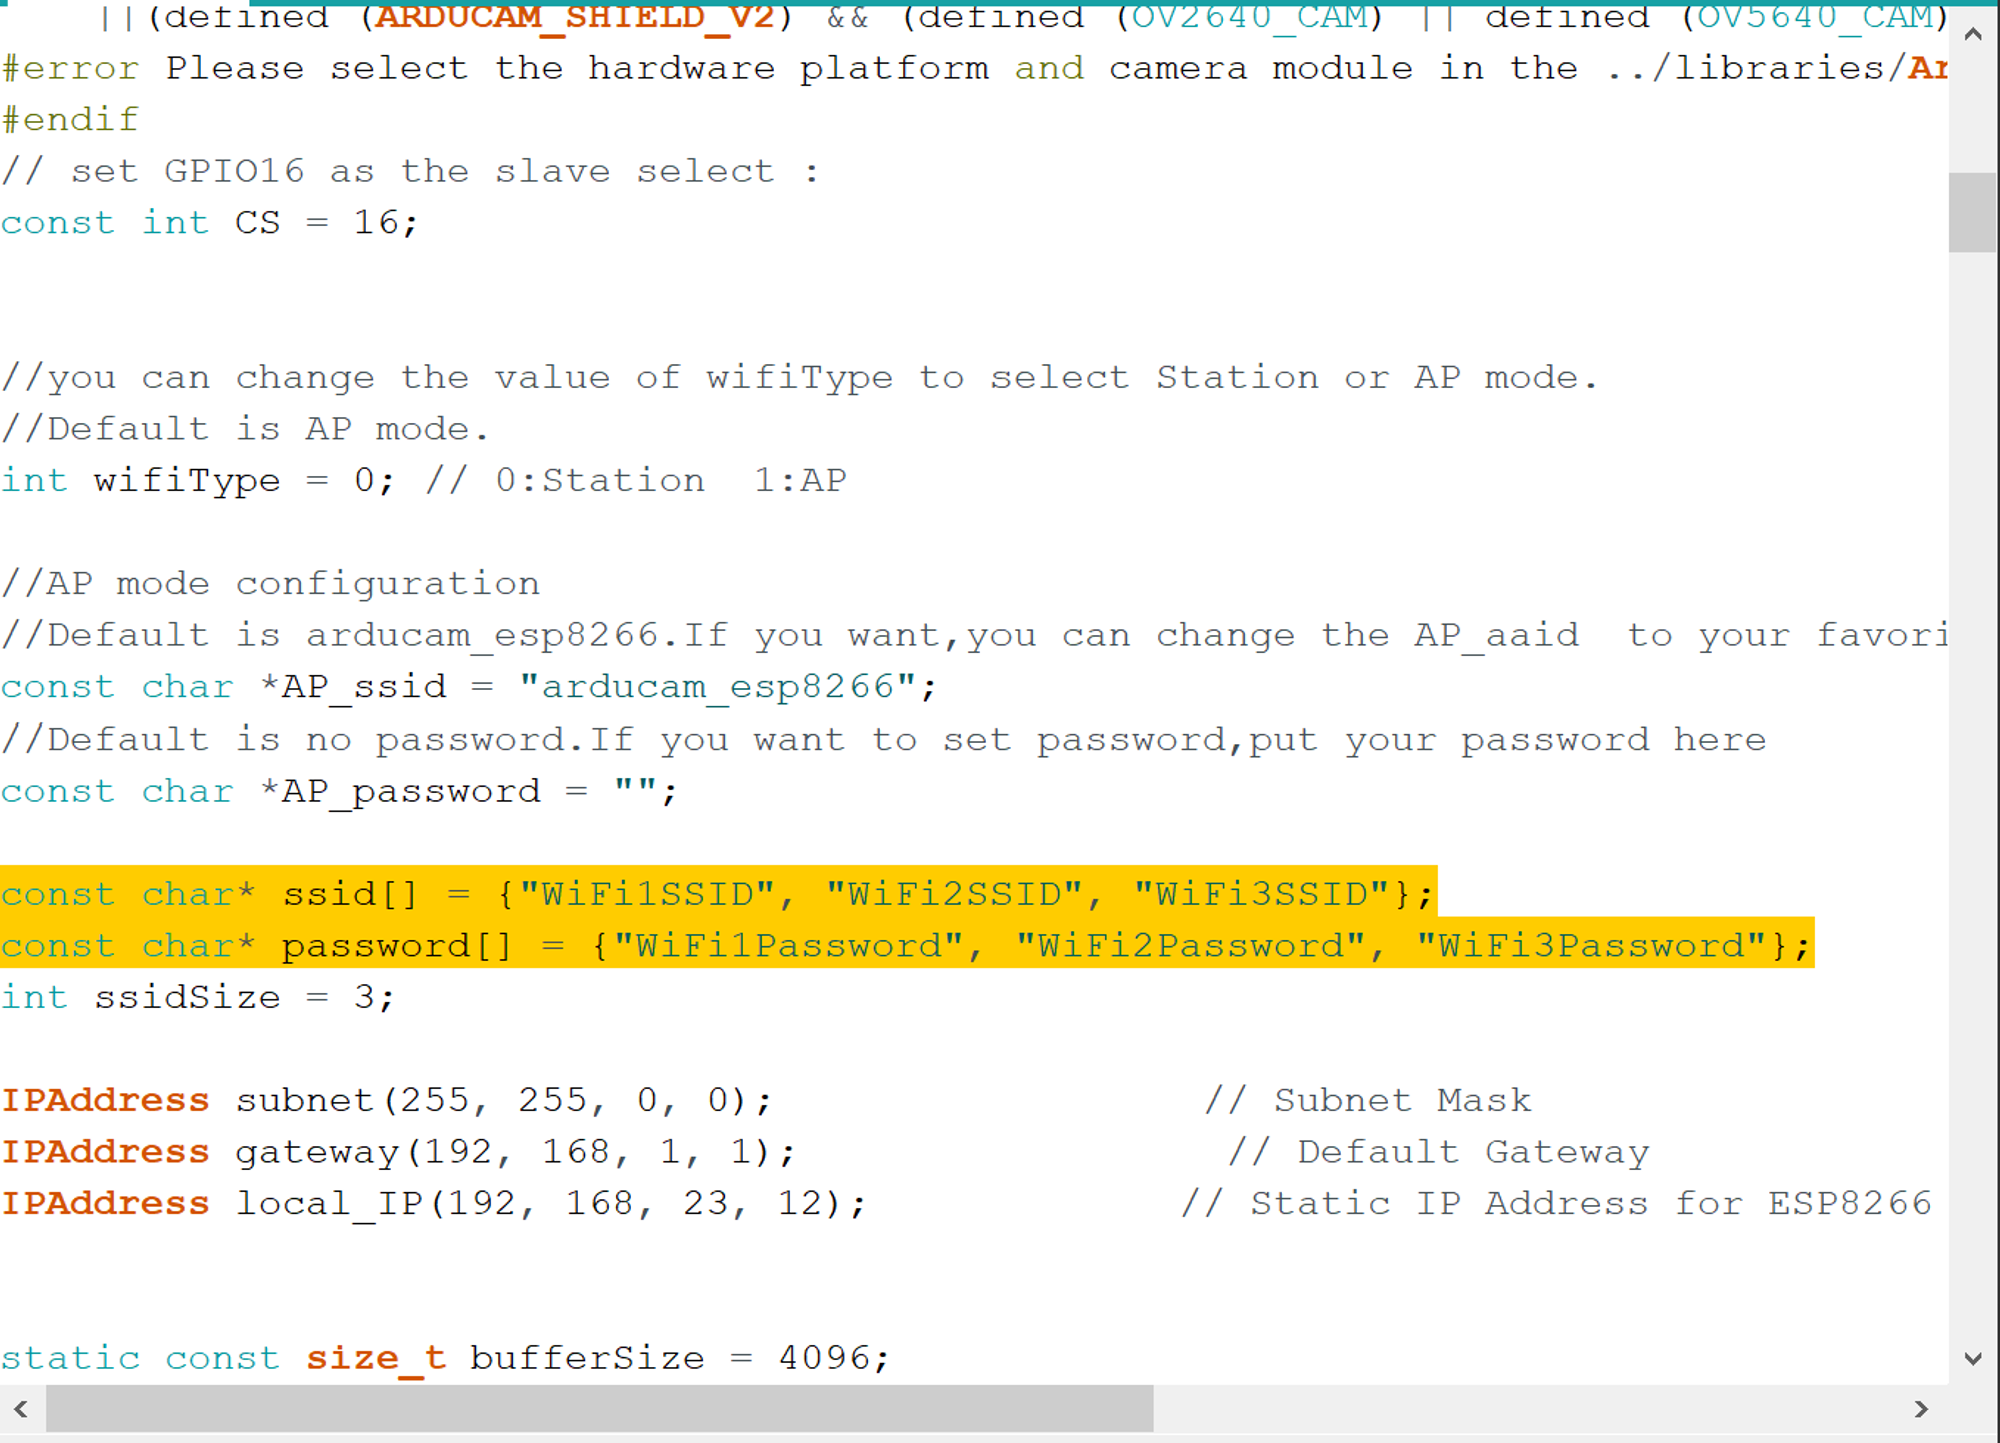
- In the code file, find the ssid and password arrays.
- Replace the default values with your own WiFi credentials.
7. Uploading the code
- In Arduino IDE, go to Tools > Board and select “NodeMCU 1.0 (ESP-12E Module)”.
- In Arduino IDE, go to Tools > Port and select the port to which the ESP8266 is connected.
- In Arduino IDE, click the Upload button.
8. Connecting the power source
- Connect the ESP8266 to a power source using a micro USB cable.
9. Accessing the camera
- Connect to the same WiFi network as the ESP8266.
- Access the camera’s video stream at **http://192.168.23.12/video**.
- Access the camera’s photo capture at **http://192.168.23.12/capture**.
Additional notes:
- The camera’s video stream and photo capture can only be accessed within the same WiFi network as the ESP8266.
- The ESP8266 can be powered by a power bank or a wall adapter.
- The code file can be modified to add more WiFi credentials or to change the static IP of the camera.
- The code file can be found in the downloaded zipped folder, inside the “src” folder.
- The required libraries can be found in the downloaded zipped folder, inside the “libraries” folder.
- The Arduino libraries folder is usually located in Documents/Arduino/libraries. If you have trouble installing the libraries, you can copy the “ArduCAM”, “UTFT4ArduCAM_SPI”, and “ESP8266-Websocket” folders from the downloaded “libraries” folder into the Arduino libraries folder.